 Find A Dealer
 Help And Support
 Product Registration
 Contact Us
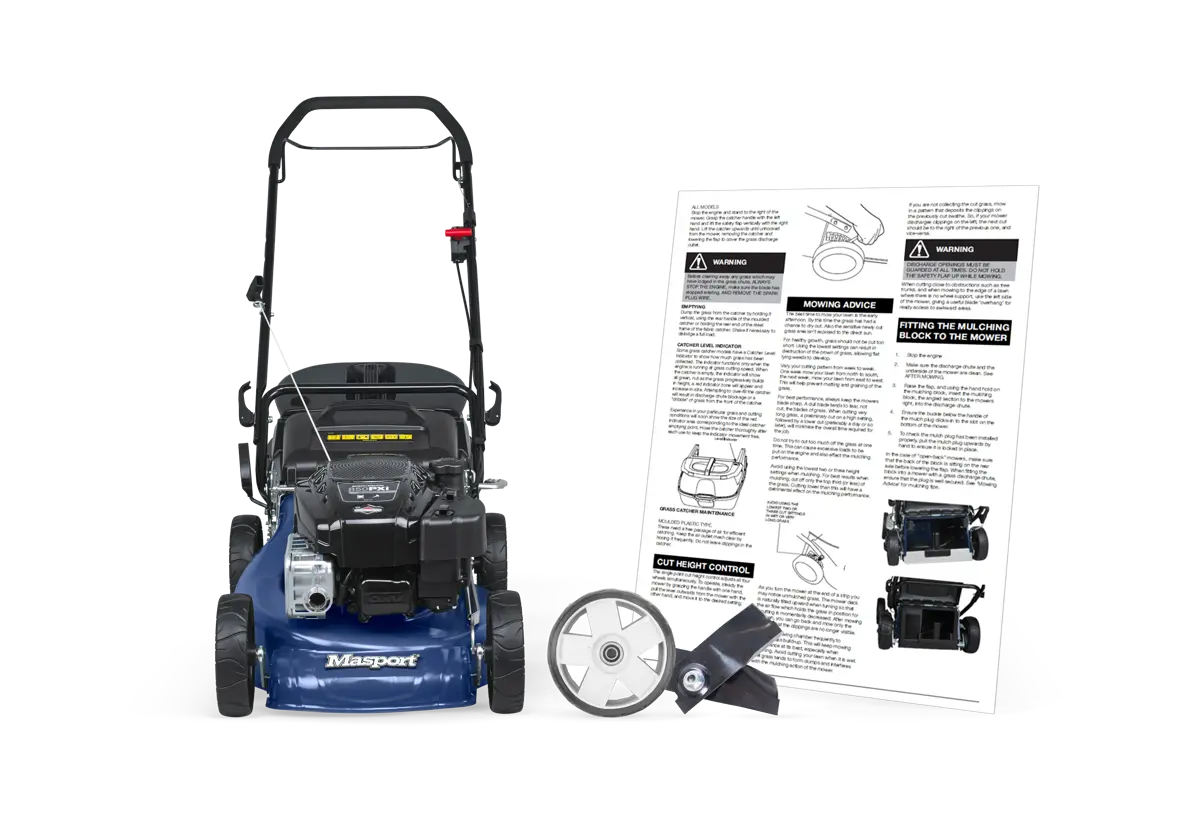
For smaller lawns that take around 30 minutes or less to mow, a compact push mower works well. Medium lawns that can take up to or over an hour to mow can benefit from a self-propelled mower to reduce fatigue. For larger lifestyle properties that take even longer to mow, consider a wider-cut rotary mower or ride-on mower to save time.
Cutting width directly affects how long mowing takes. An 18" / 46cm cut suits small to medium lawns and is easy to maneuver around garden beds. A 19" / 485cm cut is ideal for medium to large flat lawns, reducing the number of passes required. For expansive properties, a ride-on mower could save significant time. Consider your lawn’s shape too as narrower decks can navigate tight spaces and obstacles more easily.
A self-propelled mower is worth considering if your lawn is on a slope, it takes you a long time to mow the grass, or if you find pushing a mower physically tiring. The drive system takes the effort out of forward motion, letting you focus on guiding the mower.
Engine displacement (cc) indicates power capacity. A 125–149cc engine handles standard grass conditions on flat to mildly sloped lawns. A 150–189cc engine copes better with longer or thicker grass. For challenging conditions, where a lawn features dense kikuyu, steep slopes, or infrequent mowing, a 190cc or greater engine provides the torque needed to maintain consistent blade speed.
Steel chassis mowers are robust and generally more affordable, making them a solid choice. Aluminium chassis models resist rust, so if you live near the coast, an aluminium or rust-treated chassis will hold up better in salt-air environments. Both materials are durable when properly maintained, although aluminium chassis would be expected to last longer and are backed by our 10-year chassis warranty.
All Masport lawnmowers require 4-stroke oil to be poured into the oil tank before first use. The ideal grade of oil varies with environmental conditions – typically, SAE30 is good, efficient option for summertime use. However, the oil becomes too thick for use at temperatures below 5 degrees Celsius, which can decrease the working life of your engine and make it more difficult to start. 10W30 engine oil is a good-allrounder option, which performs well in cooler conditions. Consult the engine manual included with your mower for the optimal engine oil for your engine and conditions.
Yes, for shipping purposes Masport mowers do not come pre-filled with engine oil or fuel. When filling with oil, remember to use the engine's dipstick to ensure the engine has the correct amount of oil for operation. The oil level on the dipstick should come between the indicated maximum and minimum lines. Check the engine owner's manual for the volume of oil required for your mower.
First, consult the troubleshooting guide in your owner's manual. This will give some basic instruction for some of the mower common faults that engines develop. If, after consulting the troubleshooting guide, the engine is still not working correctly, consult with your local authorised Masport mower service centre for advice and/or repair.
Find your local dealer on our dealer locator: Find a Dealer
Masport mowers are fitted with a variety of different engines across a range of trusted and reputable engine manufacturers; Briggs & Stratton, Masport, Kohler and Honda. Briggs & Stratton, Masport and Kohler engines come with a standard 5-year domestic engine warranty.
An engine's displacement, measured in cubic centimetres (cc), is typically the first indication of an engine's power. Higher power engines are typically recommended for more challenging cutting conditions, and will produce better airflow for mulching and catching clipped grass. Another key measurement is the torque of the mower. This value will often be related to the "cc" of the engine, and represents the power/ability of the engine to rotate the blades. This is particularly important in conditions where the engine needs to overcome the resistance of thick/heavy grass, helping to prevent engine stalling and improve overall cut quality.
All Masport rotary lawnmowers come equipped with a form of swing-back blades. Swing-back blades are designed to protect the crankshaft by pivoting backwards when striking a heavy object, diverting force away from the engine, saving potentially costly repairs.
The four-blade disc layout is optimised to increase updraft for lifting grass underneath the mower housing. This stronger force allows mowers equipped with the Quadcut blades, and combined with Masport's high-arch chassis, to be highly efficient at both packing the catcher or mulching the grass.
The answer varies depending on weather, season and grass type. Cutting too frequently risks weakening the grass while leaving it to grow too long and attempting to cut too much at once can scalp the grass and put strain on your equipment. A good rule of thumb to follow is to only cut one-third of the length of the grass blades at a time. This could mean as short as once a week in the peak growing season, typically spring, or as long as a month or more in winter when grass growth is minimal.
The best time to mow your lawn is early afternoon. By this time the grass has had a chance to dry out from any morning dew. It's best to pick a time where the sensitive newly cut grass area isn’t exposed to hot, direct sun as the grass's protective canopy will be cut, exposing the weaker lower stems. Whichever time you pick, ensure the grass is dry when mowing your lawn. Wet grass blades tend to bend and tear rather than providing a straight, clean cut. Additionally, wet grass will be more prone to clogging the discharge chute. Mowing at night is inadvisable. Not only is this disruptive to any people who may be living nearby and be in violation of local noise ordinances, it will also be difficult to spot any hazards and the evening dew can increase risk of fungal diseases in addition to leaving you with an overall inferior cut.
For healthy growth, grass should not be cut too short. Using the lowest settings can result in destruction of the crown of grass, allowing flat lying weeds to develop. Do not try to cut too much off the grass at one time. This can cause excessive loads to be put on the engine and also affect the mulching performance. A good rule of thumb is to only cut one third of the length of grass at a time. When cutting very long grass, a preliminary cut on a high setting, followed by a lower cut (preferably a day or so later), will minimise the overall time required for the job. Consider a slightly higher cutting height if you have a cool-season grass, such as perennial ryegrass or tall fescue, consider cutting a bit higher than warm-season grass, such as kikuyu or couch. Also consider cutting grass slightly higher in summer to allow the grass to maintain a taller canopy for the soil below through the season where sunlight is at its harshest.
It's recommended to vary your cutting pattern each time you mow your grass. For example, if last time you mowed your lawn from north to south, the next week, mow your lawn from east to west. You can also consider adding a diagonal right and diagonal left to your mowing schedule. This will help prevent matting and graining of the grass as well as soil compaction and ruts.
If using a side discharge machine, it's recommended to begin mowing the perimeter first in the direction that deposits grass clippings towards the centre of the lawn to avoid depositing them into gardens or onto driveways. After two or three laps, mow in a pattern that deposits the clippings on the previously cut swathe. So, if your mower discharges clippings on the left, the next cut should be to the right of the previous one, and vice-versa.
Where possible, any obstacles on the lawn should be removed before mowing. Where an obstacle is permanent, such as a tree trunk, or when mowing to the edge of a lawn where there is no wheel support, use the left side of the mower, giving a useful blade ‘overhang’ for ready access to awkward areas.
Avoid using the lowest two or three height settings when mulching. For best results when mulching; cut off only the top third (or less) of the grass. Cutting lower than this will have a detrimental effect on the mulching performance.
As you turn the mower at the end of a strip you may notice unmulched grass. The mower deck is naturally tilted upward when turning so that the air flow which holds the grass in position for recutting is momentarily decreased. After mowing the lawn, you can go back and mow only the turns so that the clippings are no longer visible.
Clean the mowing chamber frequently to remove grass build-up. This will keep mowing performance at its best, especially when mulching. Avoid cutting your lawn when it is wet. Wet grass tends to form clumps and interferes with the mulching action of the mower.
These are the three main ways a mower handles cut grass. Catching collects clippings in a catcher bag, which is ideal for producing a neat finish and reducing thatch. Rear discharge ejects clippings behind the path of the mower and is best suited for rough paddocks or very long grass, saving you time from having to empty the catcher. Mulching finely chops clippings and returns them to the lawn as a natural fertiliser, great for lawn health and reducing waste. Many Masport mowers support all three modes of cutting.
There are a few steps required before you can begin mowing after having purchased a Masport lawnmower:
Assemble the handle
Assemble and fit the catcher if catching is your preferred cutting method.
Fit the mulch plug if mulching is your preferred cutting method.
Fill the engine with petrol with an octane rating of at least 91 with a maximum of 10% ethanol.
Fill the engine with either SAE30 or 10W30 4-stroke oil, depending on the model of your engine.
Most of these models are fully assembled when packed, so all that is needed is to remove them from the carton, swing the handle to the operating position and lock the handle lever(s). The camlock handle should be locked in the upright position, closest to the operator. If they are locked in a downwards position, to turn them around unwind the nut to the end of the thread with a 13mm A/F spanner/socket, pull the camlock handle outwards and rotate it 180 degrees. Retighten the nut until the handle locks firmly in place and it does not change position when in use.
Place the top shell on a solid work bench, open side up. Don’t use a table which may be damaged by scratching.
Position the bottom shell, upside down, over the top shell, carefully aligning the two parts and ensuring the barbed clips are aligned with their corresponding slots and squeeze the rear handles together.
Keeping the catcher upside down, move the assembly so the lip and rear handle is supported by the edge of the bench and catcher is trapped between your body and the bench.
Strike the top of the assembly with an open hand above the part supported by the bench. You should hear the barb click into place in its slot - if not, check the alignment and strike again with a little more force.
Working from left to right, and starting by the rear handle, move around the catcher, supporting each fastener in turn on the edge of the bench, as it is pushed into engagement.
Finally inspect carefully to ensure that all clips are fully engaged.
Stop the engine.
Make sure the discharge chute and the underside of the mower are clean.
Raise the flap, and using the hand hold on the mulching block, insert the mulching block, the angled section to the mowers right, into the discharge chute.
Ensure the buckle below the handle of the mulch plug clicks-in to the slot on the bottom of the mower.
To check the mulch plug has been installed properly, pull the mulch plug upwards by hand to ensure it is locked in place.
In the case of “open-back” mowers, make sure that the back of the block is sitting on the rear axle before lowering the flap. When fitting the block into a mower with a grass discharge chute, ensure that the plug is well secured.
Masport mowers come with a range of engines with different starting methods.
Models with a primer bulb will require you to press the bulb around 5 times if the engine is cold or has just been refilled with fuel. This process purges air and draws fuel towards the carburettor. Then, move the throttle lever to the "fast" position. Next, pull the starter rope slowly until increased resistance is felt. Finally, rapidly pull the starter rope until the engine starts. After the engine has warmed up, you should not need to use the primer again to start the engine while completing your mowing session, unless you have refilled the tank with fuel.
For models without a primer bulb on the engine, it should be enough to move the throttle to the 'fast' position and start the engine. The other steps are the same as outlined above.
For electric start models, ensure the key is pressed into the assembly on the handle and press the button to start the engine. In the event the engine fails to start, the B&S625EXI has a back-up pull-starter available.
Yes, there are usually a couple of smaller items to fit onto the ride-on lawnmower which have been left off the machine during transit to save space. Speak to your local service dealer about their pre-delivery process – most dealers will be happy to take care of any assembly for you.
It is recommended to either sharpen or replace dull blades. Dull blades have a risk of tearing the grass rather than making clean cuts, which can be a detriment to the health and visual appearance of your lawn. Masport's swingback blade design on our rotary mowers mean they are easily replaceable, and replacements can be purchased from where you originally purchased your mower. Remember to use genuine Masport spare parts to ensure compatibility and longevity for good cutting performance.
Firstly, ensure you have adequate hand protection for performing this operation. Remove the spark plug lead and position it to prevent accidental contact with the spark plug. Then, tilt the mower upright such that the spark plug port is pointing skywards to avoid fouling the spark plug and making the mower difficult to start. Remove the central bolt from the blade carrier. The blade tips can now be unbolted and replaced. When fitting new blade tips, ensure they are tightened to 20Nm – 25Nm. They should be tight enough that they are well secured to the blade disc, but loose enough that they can swingback as intended in the event of contact with a foreign object. Retighten the blade disc to the blade carrier to a torque of 45-50Nm. If you feel uncomfortable performing the blade replacement yourself, a local service dealer will be happy to assist.
Some models will come equipped with a washport for the deck. In this instance, fit a garden hose to the washport and start the engine, allowing a good flow of water the clean the deck for about 2-3 minutes. If your mower does not have a washport, remove the sparkplug and tilt the mower so that the sparkplug is in the uppermost position. Use a hose to washdown the inside of the housing, being cautious to avoid spraying the engine, as this can damage the air filter and ignition system. Be sure to hose the catcher clean as well. It is important to clean your mower periodically. A buildup of dry grass can be a fire hazard. For self-propelled rotary mower models, it is recommended to remove the belt cover and rear gearbox cover to clear out any debris around the gearbox and within the drive belt cavity about every 100 hours.
The exact maintenance procedure and schedule is determined by the engine manufacturer and will be outlined in the engine owner's manual. However, some general maintenance points to expect are:
Cleaning and replacing the air filter. Ensure this is properly fitted and cleaned regularly to ensure longevity of the engine. It's typically recommended to check every 25 hours or at the start of the mowing season, although it could be worthwhile to check more frequently under more adverse conditions. A dirty air filter will starve the engine of air, which can cause it to bog down. Left long enough, this could cause lasting damage to the engine.
Cleaning, gapping and maintaining the spark plug. It's typically recommended to check this every 50 hours. A fouled spark plug will show a black carbon/wet appearance. You can check the spark plug gap by using a tool to verify the gap matches the specification in the owner's manual. Spark plugs are inexpensive; replacing them annually will typically keep you in good stead for the mowing season. When replacing the spark plug, ensure you use an exact replacement of the type originally fitted to the engine.
Some models will require a periodic oil replacement. Check the maintenance instructions in the owner's manual to determine whether this will be the case for your model. It is most convenient to undo the oil dipstick and tip the mower on its side, removing the oil from the tank and collecting old oil in a suitable vessel like an old ice cream container.
Masport takes pride in our ability to help continue to service your lawnmower with the availability of spare parts to ensure the longevity of your purchase. Masport spare parts are available to purchase through Masport's authorised dealer network. Please contact your local Masport dealer, together with the model number and/or serial number for efficient service and to ensure part compatibility.
Masport highly recommends the use of genuine Masport spare parts to ensure the replacement parts are an exact, and quality, replacement for your Masport product. Additionally, the use of aftermarket spare parts can void the Express Warranty of your Masport product.
As part of the Masport Express Warranty, Masport warrants to you that each Product Component will be free from material defects in workmanship or materials from the date the Product is originally purchased until the end of the warranty period set out on the warranty card accompanying the product.
Where the Product is used for business, commercial, industrial, institutional, rental or other income-producing purposes, the warranty period for each Product Component is 90 days from the date the Product is originally purchased, unless specified otherwise.
Exclusions from the Express Warranty include, but are not limited to; failure to follow instructions set out in the operating instructions; normal wear and tear or maintenance; accidental damage, neglect, misuse; any event outside of Masport's reasonable control, including without limitation, adverse weather conditions;
Please consult the warranty card included with your product for full details on the Masport Express Warranty.
The warranty period for Masport lawnmowers varies from product to product depending on its specifications. Warranty details for a particular product can be found on the product listing on this website. As a general overview, for general consumer warranty:
Cast aluminium housings = 10-year warranty
Steel housings = 5 years
Plastic Catcher = Lifetime warranty*
Self-propelled gearbox = 2 years
All other parts = 5 years
Engine = Manufacturer's Warranty
The above information will always be superseded by the warranty card supplied with your product in any case of discrepancy.
An electronic copy of the standard Masport lawnmower warranty terms supplied with most Masport petrol lawnmowers can be found here:
The warranty for engines on Masport products is set out and honoured by the engine manufacturer. As a general guide for consumer warranty:
Briggs & Stratton = 5 years
Masport = 5 years
Kohler = 5 years
Honda = 2 years
The above information will always be superseded by the warranty card supplied with your product in any case of discrepancy.
Please consult the warranty card included with your product for full details on the Masport Express Warranty. An electronic copy for most Masport petrol lawnmowers can be found here:
Masport warrants to you that each Product will be free from material defects in workmanship or materials from the date the Product is originally purchased until the end of the warranty period of 5 years
Masport warrants to you that each Product will be free from material defects in workmanship or materials from the date the Product is originally purchased until the end of the warranty period of 2 years. For some models, an additional year of warranty coverage can be provided if you choose to register the product here:
These warranty periods are subject to change at Masport's discretion. In the event of a change in the warranty terms, Masport will always honour the warranty period as described by the warranty card included with the product at the time of purchase.
Repairs on Masport products must be carried out by an authorised Masport service agent. Failure to comply with this can result in exclusion from the Express Warranty of the product.
Please return with the Product to the place of purchase or any Masport Specialist retailer, along with reasonable evidence of the date the Product was purchased, for example, an original receipt, and the product's serial number. Masport or its agent will assess the claim and if accepted, will repair or replace the Product or Product Component in accordance with the normal practices of the relevant Masport service agent. All claims under the Express Warranty must be made within the relevant warranty period.
Masport mowers can be purchased from your local authorised Masport dealer. Alternatively, Masport mowers are sold through Australia & New Zealand's largest DIY/Hardware retail stores. To find a local Masport dealership, please use our dealer locator:
As a wholesale distributor, Masport does not sell directly to the public. Please get in contact with your local Masport dealer.
